Tuesday, November 29, 2011

Lasagna Soup

This soup I saw on Pinterest. It was delicious, although a little on the spicy side for me and the kids. Chad loved it!


Lasagna Soup


for the soup:
2 tsp. olive oil
1-1/2 lbs. Italian sausage
3 c. chopped onions
4 garlic cloves, minced
2 tsp. dried oregano
1/2 tsp. crushed red pepper flakes
2 T. tomato paste
1 28-oz. can fire roasted diced tomatoes
2 bay leaves
6 c. chicken stock
8 oz. mafalda or fusilli pasta (I actually used Raditore. Looks like mini lasgana noodles.)
1/2 c. finely chopped fresh basil leaves
salt and freshly ground black pepper, to taste

for the cheesy yum:
8 oz. ricotta
1/2 c. grated Parmesan cheese
1/4 tsp. salt
pinch of freshly ground pepper
2 c. shredded mozzarella cheese


Heat olive oil in a large pot over medium heat. Add sausage, breaking up into bite sized pieces, and brown for about 5 minutes. Add onions and cook until softened, about 6 minutes. Add garlic, oregano, and red pepper flakes. Cook for 1 minute. Add tomato paste and stir well to incorporate. Cook for 3 to 4 minutes, or until the tomato paste turns a rusty brown color.

Add diced tomatoes, bay leaves, and chicken stock. Stir to combine. Bring to a boil and then reduce heat and simmer for 30 minutes. Add uncooked pasta and cook until al dente. Do not over cook or let soup simmer for a long period of time at this point, as the pasta will get mushy. Stir in basil and season to taste with salt and freshly ground black pepper.
While the pasta is cooking, prepare the cheesy yum. In a small bowl, combine the ricotta, Parmesan, salt, and pepper.
To serve, place a dollop of the cheesy yum in each soup bowl, sprinkle some of the mozzarella on top and ladle the hot soup over the cheese.

Homemade Playdough

This is a playdough recipe from Mom. I remember her making this all the time growing up. We never had store-bought playdough. I made these two for the girls and some friends last week and they were entertained for over an hour!

Homemade Playdough
Boil 1 cup water. Then add:


1/4 c. salt
1 Tbl. alum powder
1 Tbl. baby oil
food coloring of your choice


Then stir in 1 c. flour. Add a little more if needed. Knead together. Cool and store in an air tight container.

Tuesday, September 6, 2011

Peanut Butter Energy Balls

These are really yummy! My kids like them in their school lunches. I freeze a whole batch, then all they have to do is take one or two out in the morning and its ready for them at lunch time.


Peanut Butter Balls
Original recipe source

1 – cup honey
1 1/2 – cups creamy peanut butter
2 – cups dry powdered milk
3 – cups quick or old fashioned oatmeal, uncooked
1 – 2 – tablespoons wheat germ or flax meal
1/2 cup mini chocolate chips (optional)


Mix all together with hand mixer. Form into balls with hands and freeze on a baking sheet lined with waxed paper until firm. Remove from freezer and store in a large zip lock bag in the refrigerator.

Tuesday, August 30, 2011

Whole Wheat Banana Chocolate Chip Muffins

I like to make these muffins ahead of time and then freeze for the kids' school lunches. They get tired of sandwiches so I make different kinds of muffins instead. This is one of their favorites!


Whole Wheat Banana Chocolate Chip Muffins
original recipe source

1/2 cup butter (1 stick or 4 ounces)
1/2 cup packed light or dark brown sugar
3/4 tsp baking soda
1/2 tsp salt
1/2 tsp ground cinnamon
1/4 tsp ground nutmeg
1 tsp vanilla extract
1 1/2 cups mashed ripe banana (about 3 bananas)
1/4 cup honey
2 large eggs
2 cups whole wheat flour
2/3 cups mini chocolate chips


Preheat the oven to 350. Line or grease a 12 cup muffin pan. (I usually make these in my mini muffin tins. Makes 34 mini muffins or 12 regular size and 24 mini muffins).


Beat together the butter, sugar, baking soda, salt, cinnamon, nutmeg, and vanilla in a medium bowl until smooth. Add the banana, honey and eggs, beating until smooth. Add the flour and chocolate chips, stirring until smooth. Divide batter into the muffin cups, they'll be nearly full. Bake the muffins until a cake tester inserted in the center of one comes out clean, 23-28 minutes. Remove from oven and after a couple of minutes transfer the muffins to a rack to cool.

Monday, August 29, 2011

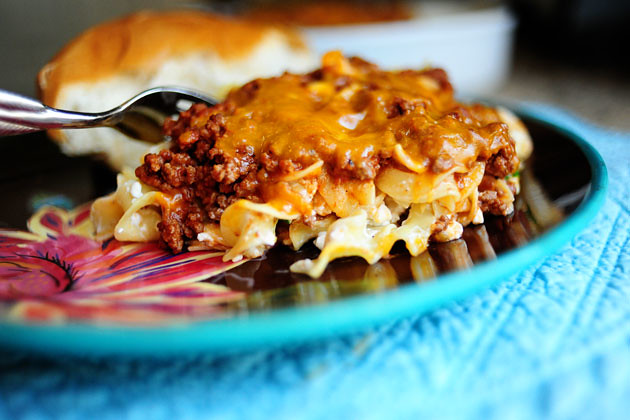
Sour Cream Noodle Bake

This recipe is from The Pioneer Woman. Our family gave it 4 stars! It is a simple, fast meal.

  • 1-1/4 pound Ground Chuck
  • 1 can 15-ounces Tomato Sauce
  • 1/2 teaspoon Salt
  • Freshly Ground Black Pepper
  • 8 ounces, weight Egg Noodles
  • 1/2 cup Sour Cream
  • 1-1/4 cup Small Curd Cottage Cheese
  • 1/2 cup Sliced Green Onions (less To Taste)
  • 1 cup Grated Sharp Cheddar Cheese

Preheat oven to 350 degrees.

Brown ground chuck in a large skillet. Drain fat, then add tomato sauce. 1/2 teaspoon salt and plenty of freshly ground black pepper. Stir, then simmer while you prepare the other ingredients.

Cook egg noodles until al dente. Drain and set aside.

In a medium bowl, combine sour cream and cottage cheese. Add plenty of freshly ground black pepper. Add to noodles and stir. Add green onions and stir.

To assemble, add half of the noodles to a baking dish. Top with half the meat mixture, then sprinkle on half the grated cheddar. Repeat with noodles, meat, then a final layer of cheese. Bake for 20 minutes, or until all cheese is melted.

Serve with crusty French bread.

Monday, July 18, 2011

Grilled Chicken and Veggie Italian Skewers

I bought Our Best Bites Cookbook at Costco (it is only $15.99 there...the cheapest I have found!) and I.LOVE.IT. Here is the newest recipe that we made last night for dinner. The hot dogs in the upper corner ruin the beautiful skewers...sorry. I used the homemade Italian dressing recipe I linked to below. It was delicious, but spicy for me so if you are sensitive to spicy buy one from the store.

Incidentally, while we were eating these delicious skewers last night, our neighbors were grilling also and their house caught on fire from the grill! They were not outside so it is a good thing we were. We were able to notice it and put it out before their house went up in flames. It was really scary. In just second it went from a grill fire to 6-8 feet of their siding on fire. Moral of the story...pull your grill away from your house!


1 lb. chicken breasts, cut into small, bite-sized pieces
1 each yellow and green zucchini squash, cut in half (if large) and sliced
8 oz. small whole mushrooms, stems removed
1 red, yellow, or orange bell pepper (or combo of 2 or more), chopped into bite-sized pieces
1 small red onion, carefully cut into bite-sized chunks (try to keep as much of the pieces in tact as possible, but don’t stress it if they start to fall apart)
Sweet cherry tomatoes
1 recipe of Zesty Italian Dressing or 1 bottle of Berenstein’s Italian Dressing (recipe tastes better if you use high quality dressing)

Place cut-up chicken in a shallow dish and pour a little less than half of the remaining dressing over the chicken. Place in refrigerator for 2-3 hours or until ready to use.

Place chopped veggies in a dish (a 9×13 pan works great) and pour remaining dressing (except for reserved 1/2 c.) over the veggies. Toss gently to combine. Set aside.

If using bamboo skewers, soak in water for about 30 minutes.

When chicken is done marinating, skewer veggies and chicken (you’ll have far more veggies than chicken, so keep that in mind when assembling your skewers; I use about 3 pieces of chicken per skewer, but as many vegetables as I can get on there). 
Preheat grill and then cook skewers for about 10-12 minutes over medium heat until chicken is cooked through and veggies are tender-crisp, turning at least once.

Saturday, July 2, 2011

Raspberry Pretzel Jello Salad

This jello is always a hit! The combo of tart raspberries, salty pretzels, and sweet middle is so yummy.

(photo coming soon!)

Crust
1/1/2 c. crushed pretzels (I put a bunch in a ziploc bag then crush them with my rolling pin)
3/4 c. melted butter
3 T. sugar

Crush pretzels and add butter and sugar. Pat into a 9x13 pan and bake at 350 for 10 minutes. Let cool before you add the other layers. You can do this part the night before if desired.

Middle
1 8 oz. cream cheese
1 c. powdered sugar
1 8 oz. tub cool whip

Blend cream cheese and powdered sugar together. Fold in cool whip. Spread on top of cooled crust.

Topping
1 large pkg. raspberry jello
2 c. water
12 oz. frozen raspberries

Boil water and mix in jello. Let cool slightly then add the frozen raspberries. This sets the jello. Pour on top of cream cheese mixture and spread around evenly. Put in fridge to set for at least an hour before serving.

Wednesday, June 8, 2011

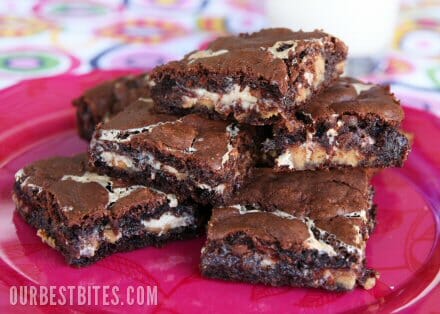
Ooey-Gooey Peanut Butter Brownies

You simply must make these brownies. My kids were sad I took that chocolate peanut butter cake away from them so I made these to compensate. THESE ARE SOME OF THE BEST BROWNIES EVER. And...they were even better the next day! Head on over to Our Best Bites and read their tutorial they have more photos and fun information.

Ooey-Gooey Peanut-Butter Brownies
Recipe from Our Best Bites

3/4 C sweetened condensed milk, divided (fat-free is fine)
1/4 C butter, melted and cooled (1/2 stick)
1/4 C non-fat milk
1  box devil’s food cake mix (18.25 oz)
1 large egg white, lightly beaten
cooking spray
1 7 oz jar marshmallow creme (about 1 3/4 C)
1/2 C peanut butter morsels (I used the whole bag..lol)

Preheat oven to 350 degrees.

With an electric mixer, combine 1/4 cup sweetened condensed milk, milk, butter, cake mix, and egg white.  Mixture will be very thick.  Spray 9×13 pan with cooking spray.  Press 2/3 of the mixture into the bottom of the pan.  Use either floured hands, or spray your hands with cooking spray in order to press it down without having it stick to your fingers.  The layer will be thin.  Bake for 10 minutes.

Combine 1/2 cup sweetened condensed milk and marshmallow creme in a bowl and combine until smooth.  Stir in PB morsels.  No one will tell if you stir in some extras.  Spread marshmallow layer over brownie layer in pan.  Carefully drop remaining brownie batter by spoonfuls over marshmallow mixture.  Bake at 350 for about 30 minutes.  Remove from oven and cool before cutting into squares.

Monday, June 6, 2011

Reese's Peanut Butter Chocolate Cake

I made this cake as a thank you to our new bishop. He helped us out a TON with our commercial and Mormon Message for girls camp doing lots of editing. He loves chocolate and peanut butter combo so I thought of making him this cake. Turned out great! Next time I am planning on cutting the Reese's cups on the top layer like I did on the bottom layer, I like how it looks better. Also I ended up with a little over one cup of frosting left so I will put more in the middle next time.


1 box devils food cake (or your favorite recipe)
1 bag Reese’s peanut butter cups (the miniature kind)

Peanut Butter Frosting:
2 cups creamy peanut butter
1/2 cup soft butter
1 1/2 tsp vanilla
1/2 tsp salt
2 cups powdered sugar
2/3 cup whipping cream

Prepare cake according to directions on box. Bake in 2 greased and floured 9″ round pans. Cool completely.

For frosting: Beat together butter, peanut butter, vanilla and salt. Add powdered sugar and enough cream to reach spreading consistency.

To assemble: Place one cake layer on a plate, flat side up. Spread with a layer of frosting. If desired, sprinkle with a few finely chopped Reese’s peanut butter cups. Top with remaining cake layer. Frost top and sides of cake. Decorate with halved Reese’s peanut butter cups. Finely chop any remaining peanut butter cups and sprinkle them in the center.

Wednesday, June 1, 2011

Summer Pasta Salad

The perfect addition to a summer bbq or potluck! I love this salad.


12-16 oz pkg colored spiral noodles
1 diced red pepper
1 diced green pepper
1 diced cucumber
sliced olives, I usually do 3/4 of a can
diced mozzarella cheese (optional)
Bernstein's Cheese Fantastico Light Italian Dressing

Boil noodles according to package directions. Do not overboil!  Want them a tad chewy.  Rinse with cold water and drain well. Add in all other ingredients and toss in a large bowl. Dump a bunch of the dressing over the salad, about 3/4 of the bottle. Sprinkle with lots of Parmesan cheese.  Stir and refrigerate. 

Best made the night before or the morning before you plan on serving it.  Very good when all the flavors meld together overnight.  When you take the salad out to serve, freshen it up by shaking in a little more Parmesan cheese and another good amount of salad dressing.  I usually end up using the whole bottle.  You could also use any other Italian dressing your family likes.  

Saturday, May 28, 2011

On my Menu

Here are a few recipes that I want to make soon. I love this time of year and eating lighter and using more fruits and veggies!


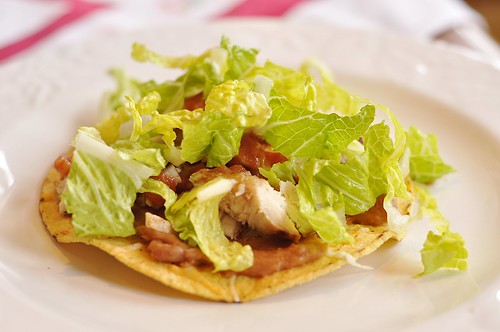
Chicken Tostadas (this marinade looks delicious!)


Fresh Fruit Brushetta with Orange Honey Cream (this will be perfect with all the mangos I am getting in my Bountiful Baskets each Saturday!)

Thursday, April 21, 2011

Apple Pie Bars

I found this recipe for apple pie bars last year and wanted to make them. I made them today, but I altered the recipe a bit. Since I have a lot of homemade apple pie filling in quart jars that I canned, I wanted to use that instead of making a fresh filling. Plus I halved the recipe since I didn't want four dozen bars! Please refer to the original recipe if you don't have apple pie filling at home to use and you want to make it from scratch. Here I will type up how I altered the recipe.


Braden and Chad said they both like these better than regular apple pie!


Crust:
3/4 c. butter, softened
6 Tbl. sugar
1 1/2 c. all purpose flour
1/8 tsp. nutmeg
1/4 tsp. cinnamon
1/4 tsp. salt

Topping:
1 1/2 c. quick oats
1 c. all purpose flour
3/4 c. light brown sugar
1/2 tsp plus 1/8 tsp cinnamon
1/4 tsp baking soda
1/4 tsp salt
3/4 c. cold butter, cut into small cubes

Prepare the crust: Preheat oven to 375 degrees. Line a 13x9.5 jelly roll pan with foil or parchment paper. Using an electric mixer, beat the butter and sugar until light and fluffy, about two minutes. At low speed, beat in the flour, spices, and salt until a soft dough forms. Press the dough over the bottom of the prepared pan. Bake in the center of oven for about 15 minutes or until golden and set. Set on wire rack to cool slightly.

Prepare the topping: In a large bowl, mix the oats and the flour, brown sugar, cinnamon, baking soda and salt. Using your fingers or a pastry tool, put the butter cubes into the oat mixture and crumble together until the mixture resembles a coarse meal. Press the mixture into clumps.

Dump on the quart bottle of your apple pie filling and spread evenly over the crust. Scatter the crumb topping on top, pressing it lightly into the mixture. There will be a lot of topping, don't worry. It will fit. Bake for 30 minutes or until the topping begins to look slightly crispy on top. Let cool and enjoy!

Monday, March 21, 2011

Pistachio Bundt Cake

I made this cake for dessert on St. Patrick's Day. We had invited a new single sister in our ward over for dinner and I wanted a nice dessert, but festive. It was delicious! It was moist enough that it didn't need frosting. I dusted it with powdered sugar like the photo. You might want to read through the reviews as there are good tips for different frosting's, egg substitutes and such.

 
Original recipe found at AllRecipes.com

  • 1 (18.25 ounce) package yellow cake mix
  • 1 (3.4 ounce) package instant pistachio pudding mix
  • 4 eggs
  • 1 1/2 cups water
  • 1/4 cup vegetable oil
  • 1/2 teaspoon almond extract
  • 7 drops green food coloring (optional)

Directions

  1. Preheat oven to 350 degrees F (175 degrees C). Grease and flour a 10 inch tube pan.
  2. In a large bowl mix together cake mix and pudding mix. Make a well in the center and pour in eggs, water, oil, almond extract and green food coloring. Blend ingredients, then beat for 2 minutes at medium speed.
  3. Pour into prepared 10 inch tube pan. Bake in the preheated oven for 50 to 55 minutes, or until cake springs back when lightly pressed. Cool in pan 15 minutes. Turn out onto a wire rack and cool completely.

Tuesday, March 15, 2011

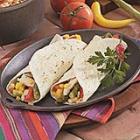
Asparagus Chicken Fajitas

I made this for dinner tonight and I loved it! The rest of my family prefers regular fajitas but I really liked the addition of asparagus and yellow pepper and corn. It was a fast meal as I already had the chicken marinated and grilled, frozen ready to use. Dinner was on the table in under 30 minutes.

Original recipe found at Allrecipes.com

Ingredients:
1 pound boneless skinless chicken
breasts, cut into strips
3/4 cup fat free Italian-style dressing
1 tablespoon vegetable oil
1 pound fresh asparagus, trimmed and
cut into 2 inch pieces
1 medium sweet red pepper, julienned
1 medium sweet yellow pepper, julienned
1/2 cup fresh or frozen corn
1/4 cup diced onion
2 tablespoons lemon juice
1/2 teaspoon garlic salt
1/8 teaspoon pepper
12 (6 inch) flour tortillas, warmed
Directions:
1. Place chicken in a large resealable plastic bag; add salad dressing. seal bag and turn to coat; refrigerate for 4 hours, turning several times.
2. Drain and discard marinade. In a large nonstick skillet, saute chicken in oil for 3 minutes. Add the asparagus, peppers, corn and onion. Cook an stir for 7 minutes or until the chicken juices run clear and vegetables are crisp-tender. Stir in the lemon juice, garlic salt and pepper. Spoon 1/2 cup on each tortilla; fold in sides.

Saturday, March 12, 2011

Oatmeal Pancake Mix


I have been using this mix recipe for months now, and I LOVE IT. My family loves it too. I got the original recipe here, and you can read more about it. I added my changes in red. This mix is so fast to put together. I keep it in this container pictured here in the fridge. I taped the instructions to the lid so we can remember how to mix them up (mostly for Chad and Braden since they don't make them as often as I do.) Try it...you will love it! Also works great for waffles.

*Makes 10 cups of dry mix

3 1/2 cups rolled (quick) oats
3 cups whole wheat flour
2 cups all-purpose flour (you can omit this and use all wheat flour)
3 tablespoons sugar
3 tablespoons baking powder
1 tablespoon salt
1 tablespoon baking soda
1 cup vegetable oil

Mix all the dry ingredients together in a mixer with a paddle (or by hand). With mixer on slow speed (or gently by hand), drizzle the vegetable oil into the bowl slowly while the mixer is running. When all the oil has been added, stop the mixer and squeeze a clump of mix in your hand. If it stays together, it is just right. If it is still crumbly, add another tablespoon of oil at a time until the consistency is correct (I’ve never had to add additional oil). Store in an airtight container for up to two weeks at room temperature or indefinitely in the refrigerator or freezer.

To make the pancakes: whisk together 1 cup of mix, (I like to use 1 1/2 c. mix) 1 cup buttermilk (a combination of half plain yogurt and half milk will also work), and 1 egg. The mixture may seem thin at first but the oats will soak up the milk as it stands while the griddle preheats. Heat a griddle and drop the batter onto it. When the edges look dry and bubbles come to the surface and don’t break, turn the pancake over to finish cooking on the second side. As a sidenote, buttermilk can be frozen indefinitely for future batches of pancakes, so it’s worth keeping it around!

(no need to buy buttermilk...take 1 c. milk, mix in 1 Tbl. vinegar and let sit for at least 5 minutes.)

Monday, March 7, 2011

Country Pasta with Mozzarella


8 oz. uncooked rigatoni (I used penne and it was wonderful)
8 slices bacon, cut in 1 inch pieces (I used real bacon pieces from Costco)
2 c. broccoli flowerets
1/2 tsp. minced garlic
2 c. shredded Mozzarella cheese
1/4 c. Parmesan cheese (I used real Parmesan)
pinch of cayenne pepper
1/4 c. chopped parsley (I used much less)

Cook rigatoni according to package directions, drain. Meanwhile, in 10 inch skillet, cook bacon over medium high heat until brown. Reduce heat to medium. Add broccoli and garlic. Cook, stirring occasionally, until broccoli is crispy-tender.

Add rigatoni and remaining ingredients, except parsley. Continue cooking, stirring occasionally, until cheese is melted. Sprinkle with parsley.

Notes: Since I used bacon pieces I just cooked my pasta, and while it was cooking I steamed my broccoli. When they were both done I added everything together. Really easy and delicious!

Orange Poppyseed Scones

A friend brought these scones to book club last month. I got the recipe from her to share! Sorry, I don't have a photo. But these are quite tasty! The notes and additions are hers, not mine. I personally haven't made this recipe yet.

2 1/2 cups all-purpose flour
1/3 cup granulated sugar
3 tablespoons poppy seeds
1 1/2 teaspoons cream of tartar
3/4 teaspoon baking soda
1/4 teaspoon salt
3/4 cup chilled unsalted butter, cut into 1/4-inch pieces 

2 large eggs, divided
5 tablespoons freshly-squeezed orange juice
*
2 teaspoons grated orange zest*
1 tablespoon milk
* You may substitute lemon juice and zest for the orange juice and zest.
Preheat oven to 400 degrees F. Spray a large baking sheet with vegetable-oil cooking spray.
In a large bowl, combine flour, sugar, poppy seeds, cream of tartar, baking soda, and salt. With a pastry blender or two knives, cut butter into flour mixture until particles are the size of small peas.
In a medium bowl, beat (1) one egg lightly with orange juice and orange zest. Add to flour mixture; stir just until mixed.
On a lightly floured surface, knead dough gently. Pat or roll out the dough into a circle 1/2-inch thick. Using a lightly greased and floured 2- or 3-inch biscuit cutter, cut into rounds, cutting close together to generate as few scraps as possible. Dip cutter into flour as often as necessary to keep dough from sticking. Push scraps of dough together so that edges join; firmly pinch edges with fingertips to make a partial seal. Pat this remaining dough to 1/2-inch thick; continue to cut 3-inch rounds. Space 1-inch apart onto prepared baking sheet.  

NOTE: When making scones, work the dough quickly and do not over mix. Scones can be cut into any shape you desire. Use a drinking glass to make circles, or cut into squares or wedges with a knife. Dip the edges of the cutter in flour to prevent the dough from sticking. Do not pat the edges of the scone down; instead leave the cuts as sharp as possible to allow the scones to rise in layers.
In a small bowl, combine 1 egg and 1tablespoon milk; brush onto top of scones. Bake 10 to 15 minutes or until golden brown. Remove from oven and serve either at room temperature or warm.
NOTE:  I combined some powdered sugar (confectioners') sugar and orange juice together to make a think icing to top the scones after baking. If making Lemon Scones, use lemon juice.
Tips: When the scones are cool, wrap airtight and hold at room temperature for up to one day or freeze to store longer. To reheat, unwrap scones (thaw wrapped, if frozen) and place onto a baking sheet. Bake in a 350 degrees oven 8 to 10 minutes or until warm.

Yields 8 to 10 large scones and 12 to 14 smaller scones.

Monday, February 21, 2011

Lemon Poppyseed Muffins

I have been on the search for a really good lemon poppy seed muffin recipe. I finally found one! I have made these muffins countless times now and they turn out great each time! I found the original recipe on Epicurious and have made it a few different ways. I am typing out here how they turn out for me.

You can also do a powdered sugar glaze on these...I usually don't when I make them for breakfast but it does make them really yummy.

I also need to put a plug in for True Lemon. This stuff is great. I use it a lot when I cook and I don't have to have real lemons or lemon juice on hand. It gives you the directions on the bottle of how much you need to substitute for lemon juice, lemon zest, etc. Chad's sister Tiffani turned me onto it and I love it. Check out their website...there is also True Orange and True Lime. Great for baking! They offer free samples and usually free shipping with a $10 order. Anyway.....here is the recipe.

2 c. white flour
1 tsp. baking powder
1/2 tsp salt
1/4 tsp. baking soda
1 c. buttermilk (1 c. milk & 1 Tbl. vinegar mixed and let sit for 5 min makes your own buttermilk)
2 Tbl. lemon juice (or 1 tsp. True Lemon)
1 c. sugar
1/2 c. (1 stick) unsalted butter at room temperature
1 Tbl. packed finely grated lemon peel (or 1/2 tsp. True Lemon)
2 large eggs
1/8 c. poppy seeds

Position rack in center of oven and preheat to 350°F. Spray three mini muffin pans or line with paper liners. Whisk flour, baking powder, 1/2 teaspoon coarse salt, and baking soda in medium bowl. Whisk buttermilk and lemon juice in small bowl to blend. Using electric mixer, beat sugar, butter, and lemon peel in large bowl to blend. Add eggs 1 at a time, beating well after each addition until mixture is light and fluffy, occasionally scraping down sides of bowl. Beat in dry ingredients in 3 additions alternately with buttermilk mixture in 2 additions. Mix just until blended. Mix in poppy seeds. Spoon batter into prepared muffin cups by generous tablespoonfuls. 

Bake muffins until tester inserted into center comes out clean, 20 to 22 minutes. Cool in pans 5 minutes. Remove muffins from pans and cool on rack.

This recipe makes 16 regular sized muffins for me. The original recipe says 36 mini muffins, but I came out with more mini muffins too.

**You can also substitute 1 c. plain yogurt for the buttermilk. I have done that and they turned out super moist and yummy! I almost prefer it that way.

Chicken Ranch Pizza

Every other Friday is pizza night at our house. This last week I made this recipe for Chicken Ranch Pizza. I added bacon to it like it says in the notes at the bottom. It was very good! I also used her recipe for pizza crust, which was good. The only change I would make is not use all the dough for the pizza crust. On my pizza stone, that amount of crust was a little much for me. It was a little too "deep dish." If you have a larger stone or pizza pan then it will spread out more.

1 recipe for pizza crust
2-3 chicken breasts
1/2-3/4 cup Ranch dressing
2 cups mozzarella cheese
1 1/2 cups chopped Roma tomatoes
1/4-1/3 cup green onions
1-2 cups cheddar cheese

Cook and shred chicken. Divide crust in half and roll crust out on greased cookie sheets that have been sprinkled with cornmeal. Poke holes all over the crust with a fork. Bake at 425 for 7 minutes. Spread dressing over crust. Sprinkle mozzarella, then tomato, green onions, and chicken. Top with cheddar cheese. Bake 15 more minutes or till crust is lightly browned and cheese is melted.

Notes:
-You can also make this as one large pizza and fill a 15″x10″ pan. Increase the baking time to 20-25 minutes.
-Roma tomatoes work best because they are more meaty and have less juice. If you want to use regular tomatoes, they will work if you follow these steps: Cut the tomato in half. Hold it over the sink in the palm of your hand and squeeze to remove most of the juice and seeds. Then proceed to dice the tomato. If you don’t do this, the juice from the tomatoes will make the pizza soggy. Not so good.
-If you really love garlic, you can add an extra minced garlic clove to the dressing.
-This is also fabulous with cooked bacon crumbled on top of the chicken.

Thursday, February 17, 2011

Cowgirl Cookies


I made these cowgirl cookies twice before Valentines Day. The second time I doubled the recipe. VERY good cookies! Bakerella also shows you how to make them into a super cute jar gift too. Check out her post all about it.

1 1/3 cup all purpose flour, spooned into measuring cup & leveled
1 teaspoon baking powder
1 teaspoon baking soda
1/4 teaspoon salt
1 cup cooking oats
3/4 cup m&ms
3/4 cup semi-sweet chocolate chips
1/2 cup brown sugar, packed
1/2 cup white sugar
1/3 – 1/2 cup chopped pecans
Stir all the dry ingredients in a large mixing bowl.

Add
1 slightly beaten egg
1/2 cup butter (melted slightly in the microwave)
1 teaspoon vanilla

Mix wet ingredients into dry ingredients. Use the back of a large spoon to work it all together. You may even need to use your hands to get everything incorporated. Then roll the cookie dough into 1 1/2 inch balls, place on a parchment covered baking sheet and bake for about 10 minutes in a preheated 350 degree oven. I got about 26-28 cookies out of these.

BBQ Chicken Salad

We had this for dinner tonight. It was a nice change from regular taco salad. I even made the crispy tortilla strips...so easy and really yummy!  They really added to the salad. This recipe is a keeper for us. I am typing the way I made it here as I did change some things, but for the original recipe go to  The Sister's Cafe.


1 can Costco chunk chicken, drained and rinsed
3/4 c. bbq sauce
1 head lettuce, chopped (can use any type of lettuce)

1 can corn, drained and rinsed
1 can black beans, drained and rinsed
1 bunch green onions, chopped
1/2 bunch cilantro, chopped
Roma tomatoes, diced..however much you want
guacomole

shredded cheese, Mexican blend or cheddar
crispy tortilla strips (see recipe below)


Stir shredded chicken in with the BBQ sauce until well coated. Of course you can use less or more sauce, it's up to you!  Toss together the lettuce, cilantro, corn, beans, and chopped veggies. Top with shredded chicken, cheese and crispy tortilla strips. Drizzle ranch or cilantro lime dressing over salad and enjoy!

*to make crispy tortilla strips simply slice about 10 corn tortillas in narrow strips and place on cookie sheet. Spray with vegetable oil cooking spray and sprinkle generously with salt. Place under the broiler and let bake until crispy and brown around the edges.

Saturday, February 5, 2011

Eggs Benedict Breakfast Casserole

This recipe is AMAZING. We had it for breakfast this morning at our young women leadership training overnighter. Holy cow. I want more just thinking about it. You make it the night before then pop in the oven the next morning. Another leader made it and I wish I took a photo. It was beautiful as well as delicious! She used the small diced ham instead of large Canadian bacon slices. I prefer that myself. You could serve this with or without the sauce. But the sauce is also incredible. This is a new favorite!

Recipe originally found HERE.

6 English Muffins
10 -12 ounces Canadian bacon (2 packages, or use diced ham) 
8 large eggs
2 cups milk  
1 teaspoon onion powder  
cooking spray  
1/2 teaspoon paprika
easy hollandaise sauce

Directions:

Prep Time: 20 mins
Total Time: 1 1/2 hrs
  1. Cut muffins into 1/2-inch cubes. Set aside. Cut Canadian bacon into 1/2-inch squares. Set aside. Whisk the eggs well in a 2-quart bowl. Whisk in milk and onion powder.
  2. Spray a 9-by-13-inch glass or ceramic baking dish with cooking oil spray. Scatter half the Canadian bacon evenly in bottom of dish. Scatter muffin cubes on top of Canadian bacon. Top with the remaining Canadian bacon, scattering it evenly over the bread. Pour egg mixture over the casserole. Cover the dish with plastic wrap and refrigerate overnight, or at least 8 hours, to let bread absorb egg mixture.
  3. Preheat oven to 375 degrees F. Remove casserole from refrigerator and uncover it. Lightly sprinkle the paprika evenly over the top. Cover the casserole with foil and bake for 40 minutes. Remove dish from the oven, remove foil, return dish to the oven and continue to bake, uncovered, until the eggs are set and the bacon on top begins to crisp, about 20 minutes more. Remove the casserole from oven and let it stand 5 minutes before serving.
  4. While casserole bakes, make Easy Hollandaise Sauce. To serve, cut casserole into squares and place them on plates. Spoon about 2 tablespoons (or to taste) warm Hollandaise Sauce over each serving just before serving.
  5. Makes 10 servings.
  6. NOTE: Time does not reflect refrigeration time of at least 8 hours, nor standing time of 5 minutes.

Wednesday, February 2, 2011

Power Enchiladas

These enchiladas were amazingly good! I loved them. I knew my kids would be wary with all the green so I halved the recipe. I also used white tortillas to appeal to them. They didn't care for it, but I think these are my new favorite enchilada recipe! Chad even liked them a lot and he doesn't care for zucchini. We rated this recipe 4 out of 5 stars.

Recipe from The Sisters Cafe. 


HEALTH ALERT: THESE ENCHILADAS ARE PRETTY DANG GOOD FOR YOU.

With all the irresistible Christmas sweets headed your way, I thought I might throw at least one healthy dish your way. My sis, Melis, got this recipe years ago from a personal trainer/friend. This isn't your typical enchilada dish. It's PACKED with nutrients and I think it still tastes wonderful! In fact, I'm sure you could sneak in a lot more veggies than the recipe even calls for and no one would know the difference. The original recipe called for red enchilada sauce. I make it with green enchilada sauce since I prefer it, and I love it!

Power Enchiladas
Submitted by Amy ~ The Sisters Cafe
Printable Recipe here

4 oz. fat free chicken broth
1 T. canola oil
1 cup chopped onion
1/2 cup chopped green bell pepper
1 cup grated zucchini
2 cups boneless, skinless chicken breast, cooked and shredded
2 T. chopped cilantro
1 1/2 or a little more:) cups grated low fat, part-skim mozzarella cheese
1 (4 oz) can diced green chilies (or use fresh)
4 cloves garlic
1 (19 oz) can green enchilada sauce
8-10 whole wheat tortillas
Sliced black olives (3-5 per enchilada)
Light or fat free sour cream

Preheat oven to 350 degrees F. Prepare all ingredients for assembly. In a large frying pan, bring chicken broth and canola oil to just boiling. Add onion and green pepper to broth and saute until onions are tender. Add grated zucchini and saute until just cooked. Drain off liquid and remove pan from heat. Add cooked chicken to vegetable mixture and stir. Add cilantro, 1 1/4 cups of grated cheese (reserving 1/4 cup for later), green chilies, and garlic. Stir to combine.

Layer 1/2 cup enchilada sauce into the bottom of a 9 x 13 dish sprayed with non-stick cooking spray. Fill tortillas with meat and vegetable mixture. Spoon about 1 T. enchilada sauce over meat mixture. Roll tortillas up and turn enchilada seam down. Ladle remaining sauce over enchiladas, making sure tortillas are completely covered in sauce (so they don't dry out). Cover with tin foil and bake 12-15 minutes. Remove foil and sprinkle enchiladas with remaining 1/4 cup (or a little more:) grated cheese. Bake 10 minutes more until cheese is melted. Then turn on broiler and place enchiladas nearer the top of oven. Let it broil until cheese is slightly brown and crispy. Garnish with olives and sour cream.

Monday, January 24, 2011

Sunday Roast Beef Stroganoff

My whole family (even Nic) loves this dinner. It is perfect for a busy Sunday. Try it. I guarantee it will be a favorite.

2-3 lb. chuck roast
1 envelope onion soup mix
1 c. water
1 can cream of mushroom soup
1 c. sour cream

Brown roast. Add water and soup mix. Cover and bake in 350 degree oven for 3-4 hours. Remove from oven and stir in soup and sour cream. Serve over hot noodles, rice, or mashed potatoes.

Blue Moose Soup


1 pkg Jimmy Dean sausage--either spicy or italian
1 onion chopped
1 large can crushed or chopped tomatoes
2-3 cans chicken broth
oregano, cayenne pepper, black pepper, and salt to taste.
2-3 cups cooked rice (can put 1 cup uncooked rice in with soup, but I think it takes too long to cook; easier to cook the rice simultaneously or before hand)
1 can garbanzo beans
1 pkg frozen chopped spinach
1 pkg feta cheese

Cook the sausage and onion together in a large sauce pan. When sausage is done, add the tomatoes, 2 cans chicken broth, garbanzo beans, and spices. Let simmer 10 minutes. Add cooked rice and spinach and simmer until spinach is ready. May want to add additional can of chicken broth if it is too thick. To serve, top with crumbled feta cheese. (It really needs the feta to taste right. So add plenty on top!)

**Keeps well in the fridge for 5-7 days, also freezes well. Over time the rice soaks up a lot of the moisture; for leftovers add a little water and salt.**

Marne's Notes: My friend and fellow YW Presidency member Jennifer made this soup for our Secret Grandma Reveal  a few weeks ago. It was so good! She calls it Blue Moose because they copied it from the Blue Moose Restaurant and didn't know what it was really called. Try it...you will love it! I am not normally a fan of feta cheese but it really makes the soup. Don't leave it out!

30+ Free Printable Recipe Cards


Today I found some really cute printable recipe cards and other freebies relating to the kitchen. There are more than 30 to choose from! Have fun organizing your recipes on pretty cards.

Friday, January 14, 2011

White Chili

This is one of my favorite crock pot soup recipes, and it's also a Weight Watchers recipe, but its so good you'd never know! This is one of the meals I make to take to anyone in need and it's always a hit!

3 boneless, skinless chicken breasts, cooked and diced
1 c onion, diced
2 cloves garlic, minced
1 can diced green chiles
1 tsp ground cumin
1/2 tsp dried oregano leaves
32 oz carton of chicken broth
3 cans white navy beans, rinsed and drained
1 c shredded Monterey Jack cheese

Add all ingredients to crock pot except cheese. Keep the crock pot on LOW and simmer for as long as you want to. Right before serving, turn off the crock pot and add the cheese. Stir until melted.

Beef Stroganoff with Rice

Another one from "365 Days of Slow Cooking"! Can you tell I enjoy this cookbook? And why not? It's making dinner for me!

1 1/2 lbs beef stew meat (mine was frozen)
2 T onion soup mix
1 (4 oz) can mushrooms, drained
1 can Cream of Mushroom Soup
1/2 cup sour cream
4 oz cream cheese

In 2-3 quart slow cooker, mix stew meat and dry soup mix until evenly coated. Top with mushrooms and soup. Cover and cook on LOW for 7-8 hours. About 30 min before serving, cook rice. Just before serving, stir sour cream and cream cheese into beef mixture until smooth. Serve over rice.
(Mine cooked in about 3 hours on LOW in my quirky crock pot!)

Slow Cooker Sweet & Sour Chicken

Another recipe from "365 Days of Slow Cooking"! This one is really yummy!!

4 boneless, skinless chicken breasts (mine were frozen)
1 cup Catalina dressing
1 cup apricot jam
1 packet onion soup mix

Place chicken in slow cooker and combine other ingredients in a small bowl. Pour sauce over the top of the chicken. Cook on HIGH for 3 hours and serve over rice.
(Since my crock pot cooks faster, I cooked on LOW for 3 hours and it was perfect!)

Chicken A La King

This recipe is from one of my new cookbooks, "365 Days of Slow Cooking" which I love! The author is Karen Petersen and it's got lots of great crock pot recipes! I modified this one slightly - my modifications are in parenthesis.

3 lbs chicken tenders, cut in half (2 lbs)
1 16 oz package baby carrots (1/2 pkg)
2 red bell peppers, chopped (1 pepper)
1 onion, chopped
3 garlic cloves, minced (1 garlic clove)
1 8 oz. pkg cream cheese, cut into cubes
2 jars Alfredo sauce, (1 jar)
1 cup milk
1 can Cream of Chicken Soup
1 tsp dried basil leaves
1/8 tsp pepper
Hot cooked noodles, mashed potatoes, biscuits or rice

Place chicken in 5-6 quart slow cooker. Add carrots, bell peppers, onions and garlic; mix gently. In food processor or blender, combine cream cheese with Alfredo sauce and milk; process or blend until combined. Pour into large bowl and add cream of chicken soup, basil and pepper. Mix well. Pour sauce into slow cooker. Cover and cook on LOW for 7-9 hours or until chicken and vegetables are tender. Serve over hot cooked noodles, potatoes, biscuits, or rice.
Angela's way: my crock pot tends to cook fast, so I usually put any meat I'm cooking into the crock pot frozen. So my chicken tenders were frozen pieces when I added them. Frozen meat makes more tender and juicy meat, I've found. The amount I did in my crock pot, with my modifications, cooked in 4 hours on LOW in my crock pot. The chicken was perfect - tender and juicy and the sauce was delicious! One of the cooking tips for using a crock pot that Karen suggests in this cookbook, if your crock pot is 1/2 full, it will cook the best.